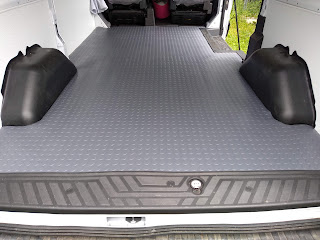
We have been building and planning for building on Marvin for a long time. Now that school is out and we have plans to do some traveling it is time to get projects completed. I posted this week about the craft projects that I have been working on and finally got installed. This post is about what we did with the flooring. Lots of Van Lifers put a lot of work into this project but there are is no extra insulation, heated lines, or hardwood here. We do things the "almost" simple way.
The original floor in Marvin is a black rubber mat with some sort of shredded denim-like insulation that helps level out the floor by fitting in the metal bed gaps.
It does a good job and is much better than the plain metal floor that is visible above where FabHub removed the step cover. You can also see the reason he wanted to change the exposed flooring. Every time we get in and out with shoes on there are footprints left behind. Cleaning them up is not on this somewhat grippy texture is not as easy as sweeping or a quick damp wipe. We decided to get some grey vinyl coin flooring.
Husky-Coin-10-ft-Wide-x-Your-Choice-Length-Grey-Commercial-Grade-Vinyl-Flooring
Yes, we could have pulled out the original matting and used it as the template, but that would be too easy. Or maybe not. By the time I got the template done, the vinyl was flattened out. So we moved on to slicing into the floor.
The next step was to cut the passenger side out and installation!!


No comments:
Post a Comment